If you have a few pots and you would like to find a place or a special holder for them, it’s not complicated. Whether you want to use it in the garden or on the balcony, this type of holder integrates perfectly with the decor. Here’s what to do:


Step 1: Preparing the tools
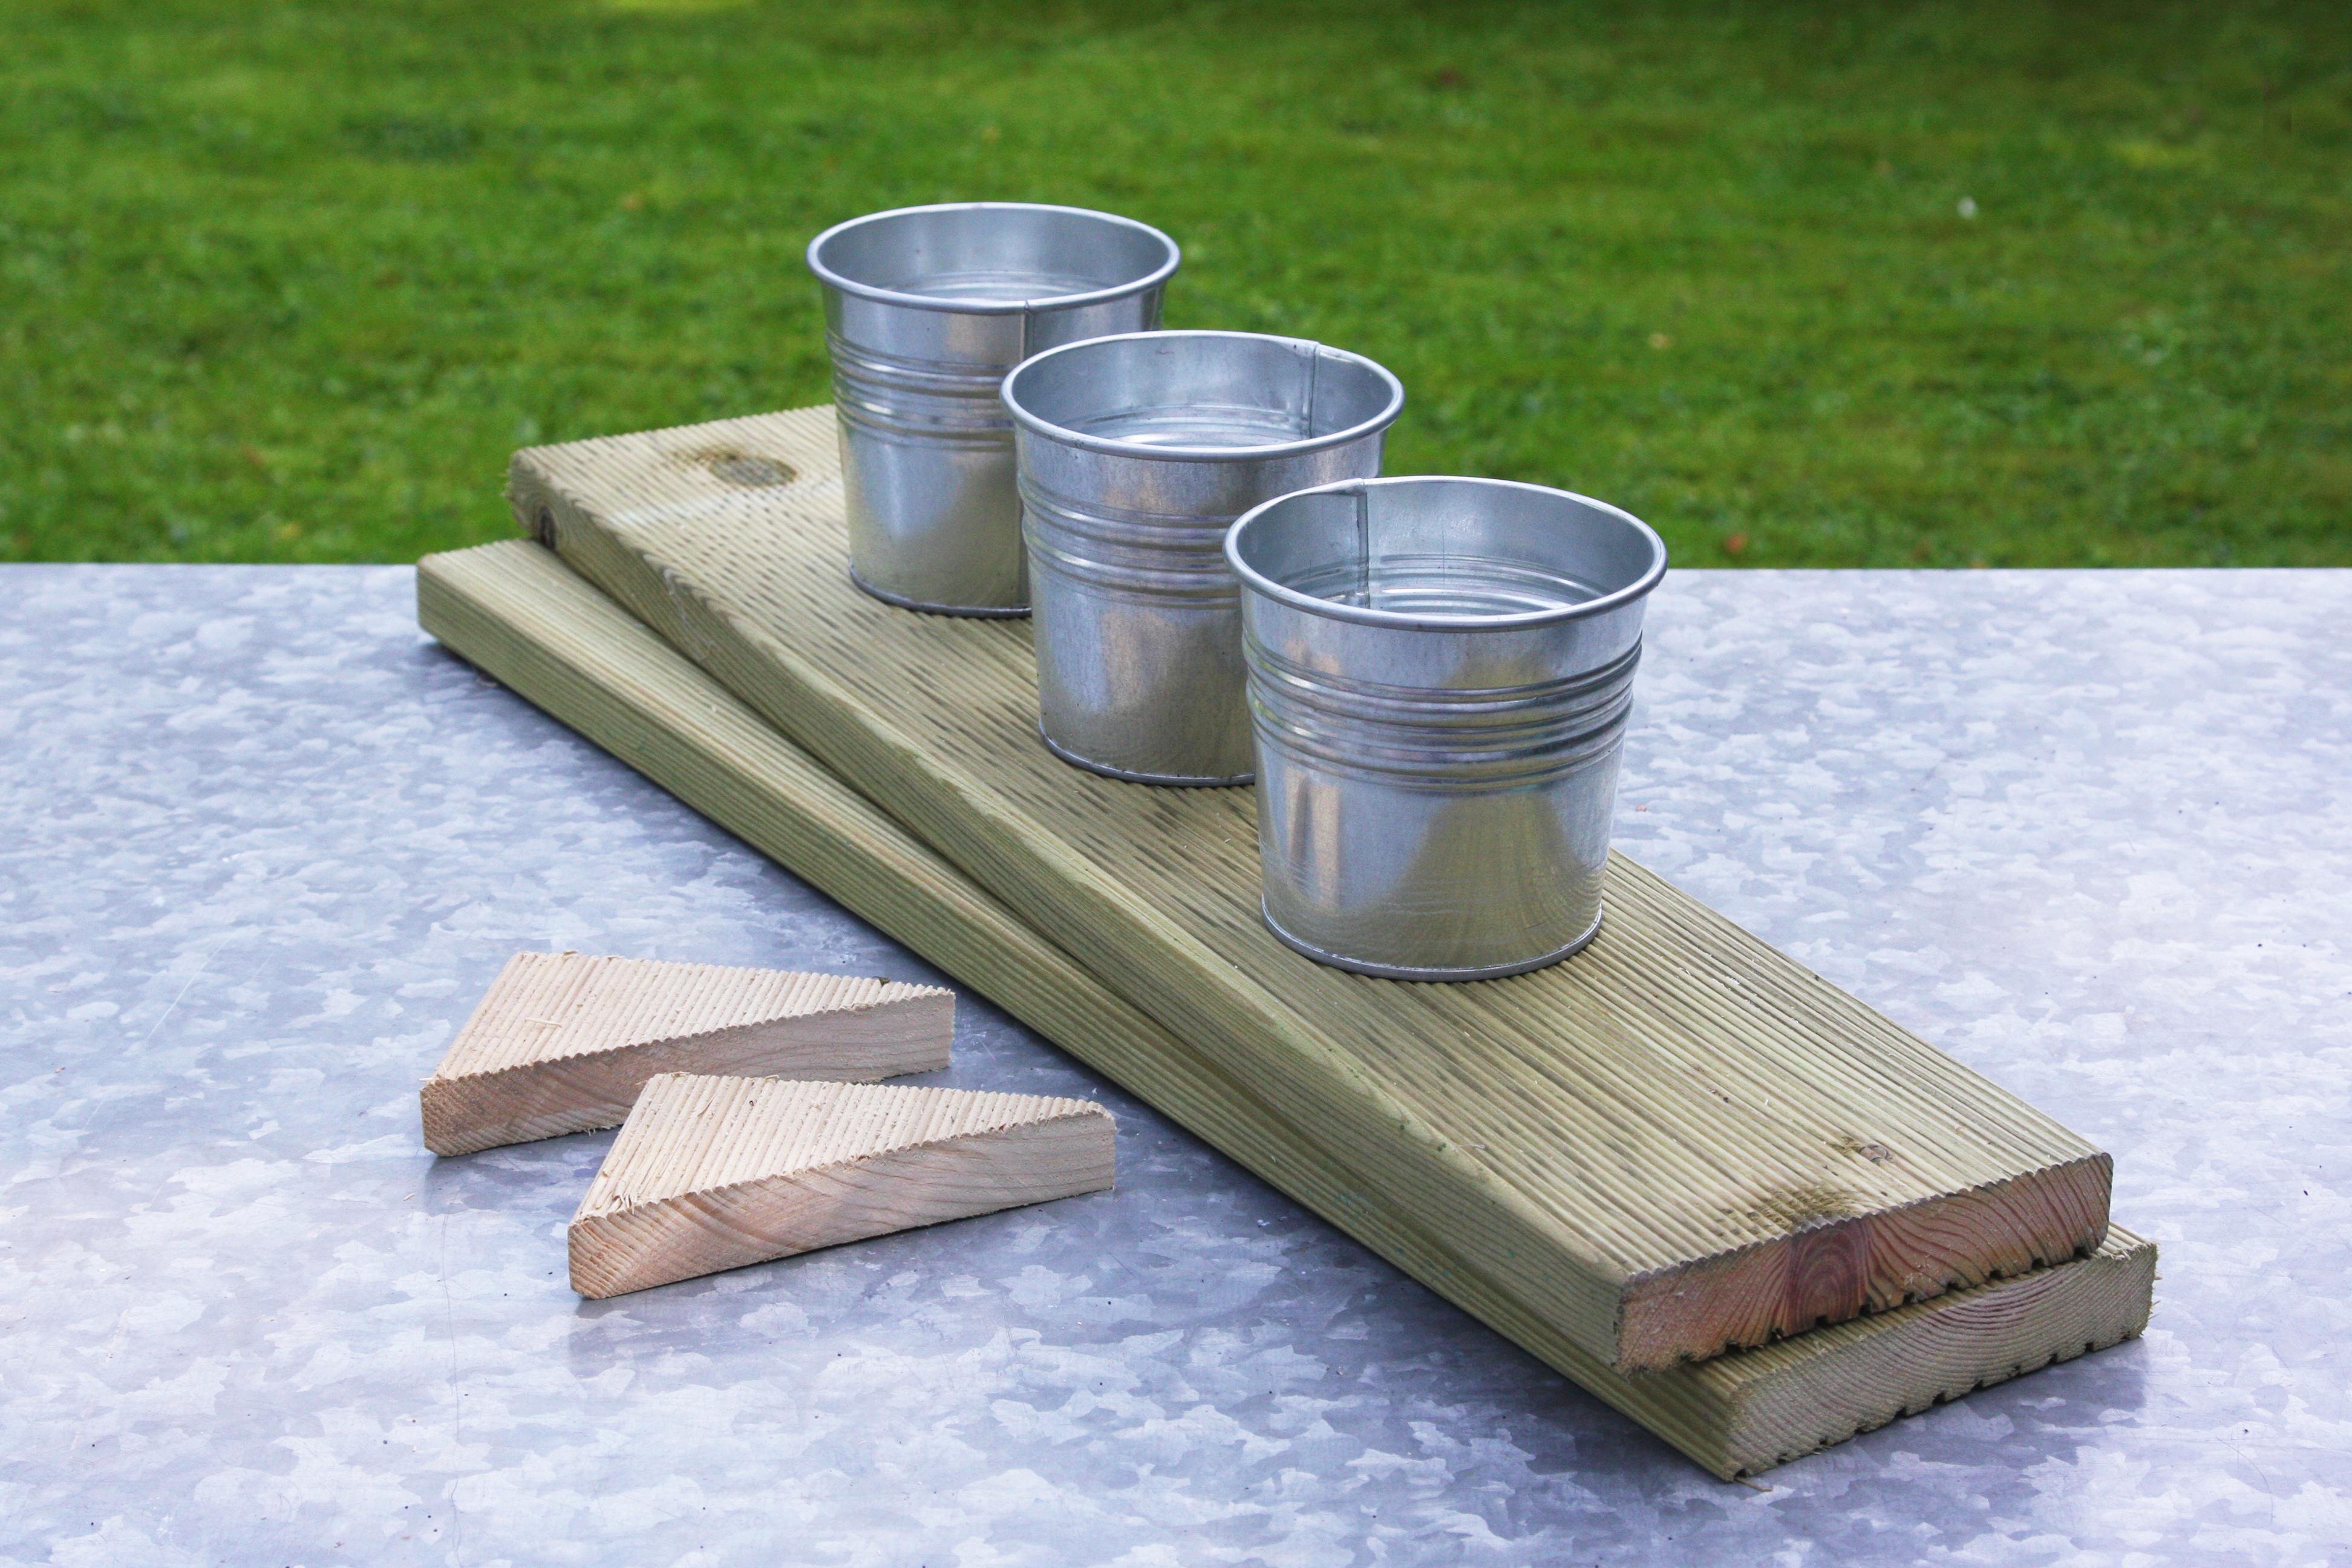
You need 3 metal buckets that will serve as holders for pots, two wooden boards perfectly cut to fit the shelf and two wooden triangles which will hold the top shelf.
You can buy the wooden boards from DIY home & deco stores, already cut. You’ll just have to polish them with sand-paper. You also need paint – you choose the color – or lacquer if you want to keep the wood color. You also need nails, a hammer, a cutter or a circular saw if you want to do everything at home. If not, you can cut the boards in the DIY stores when you buy them).
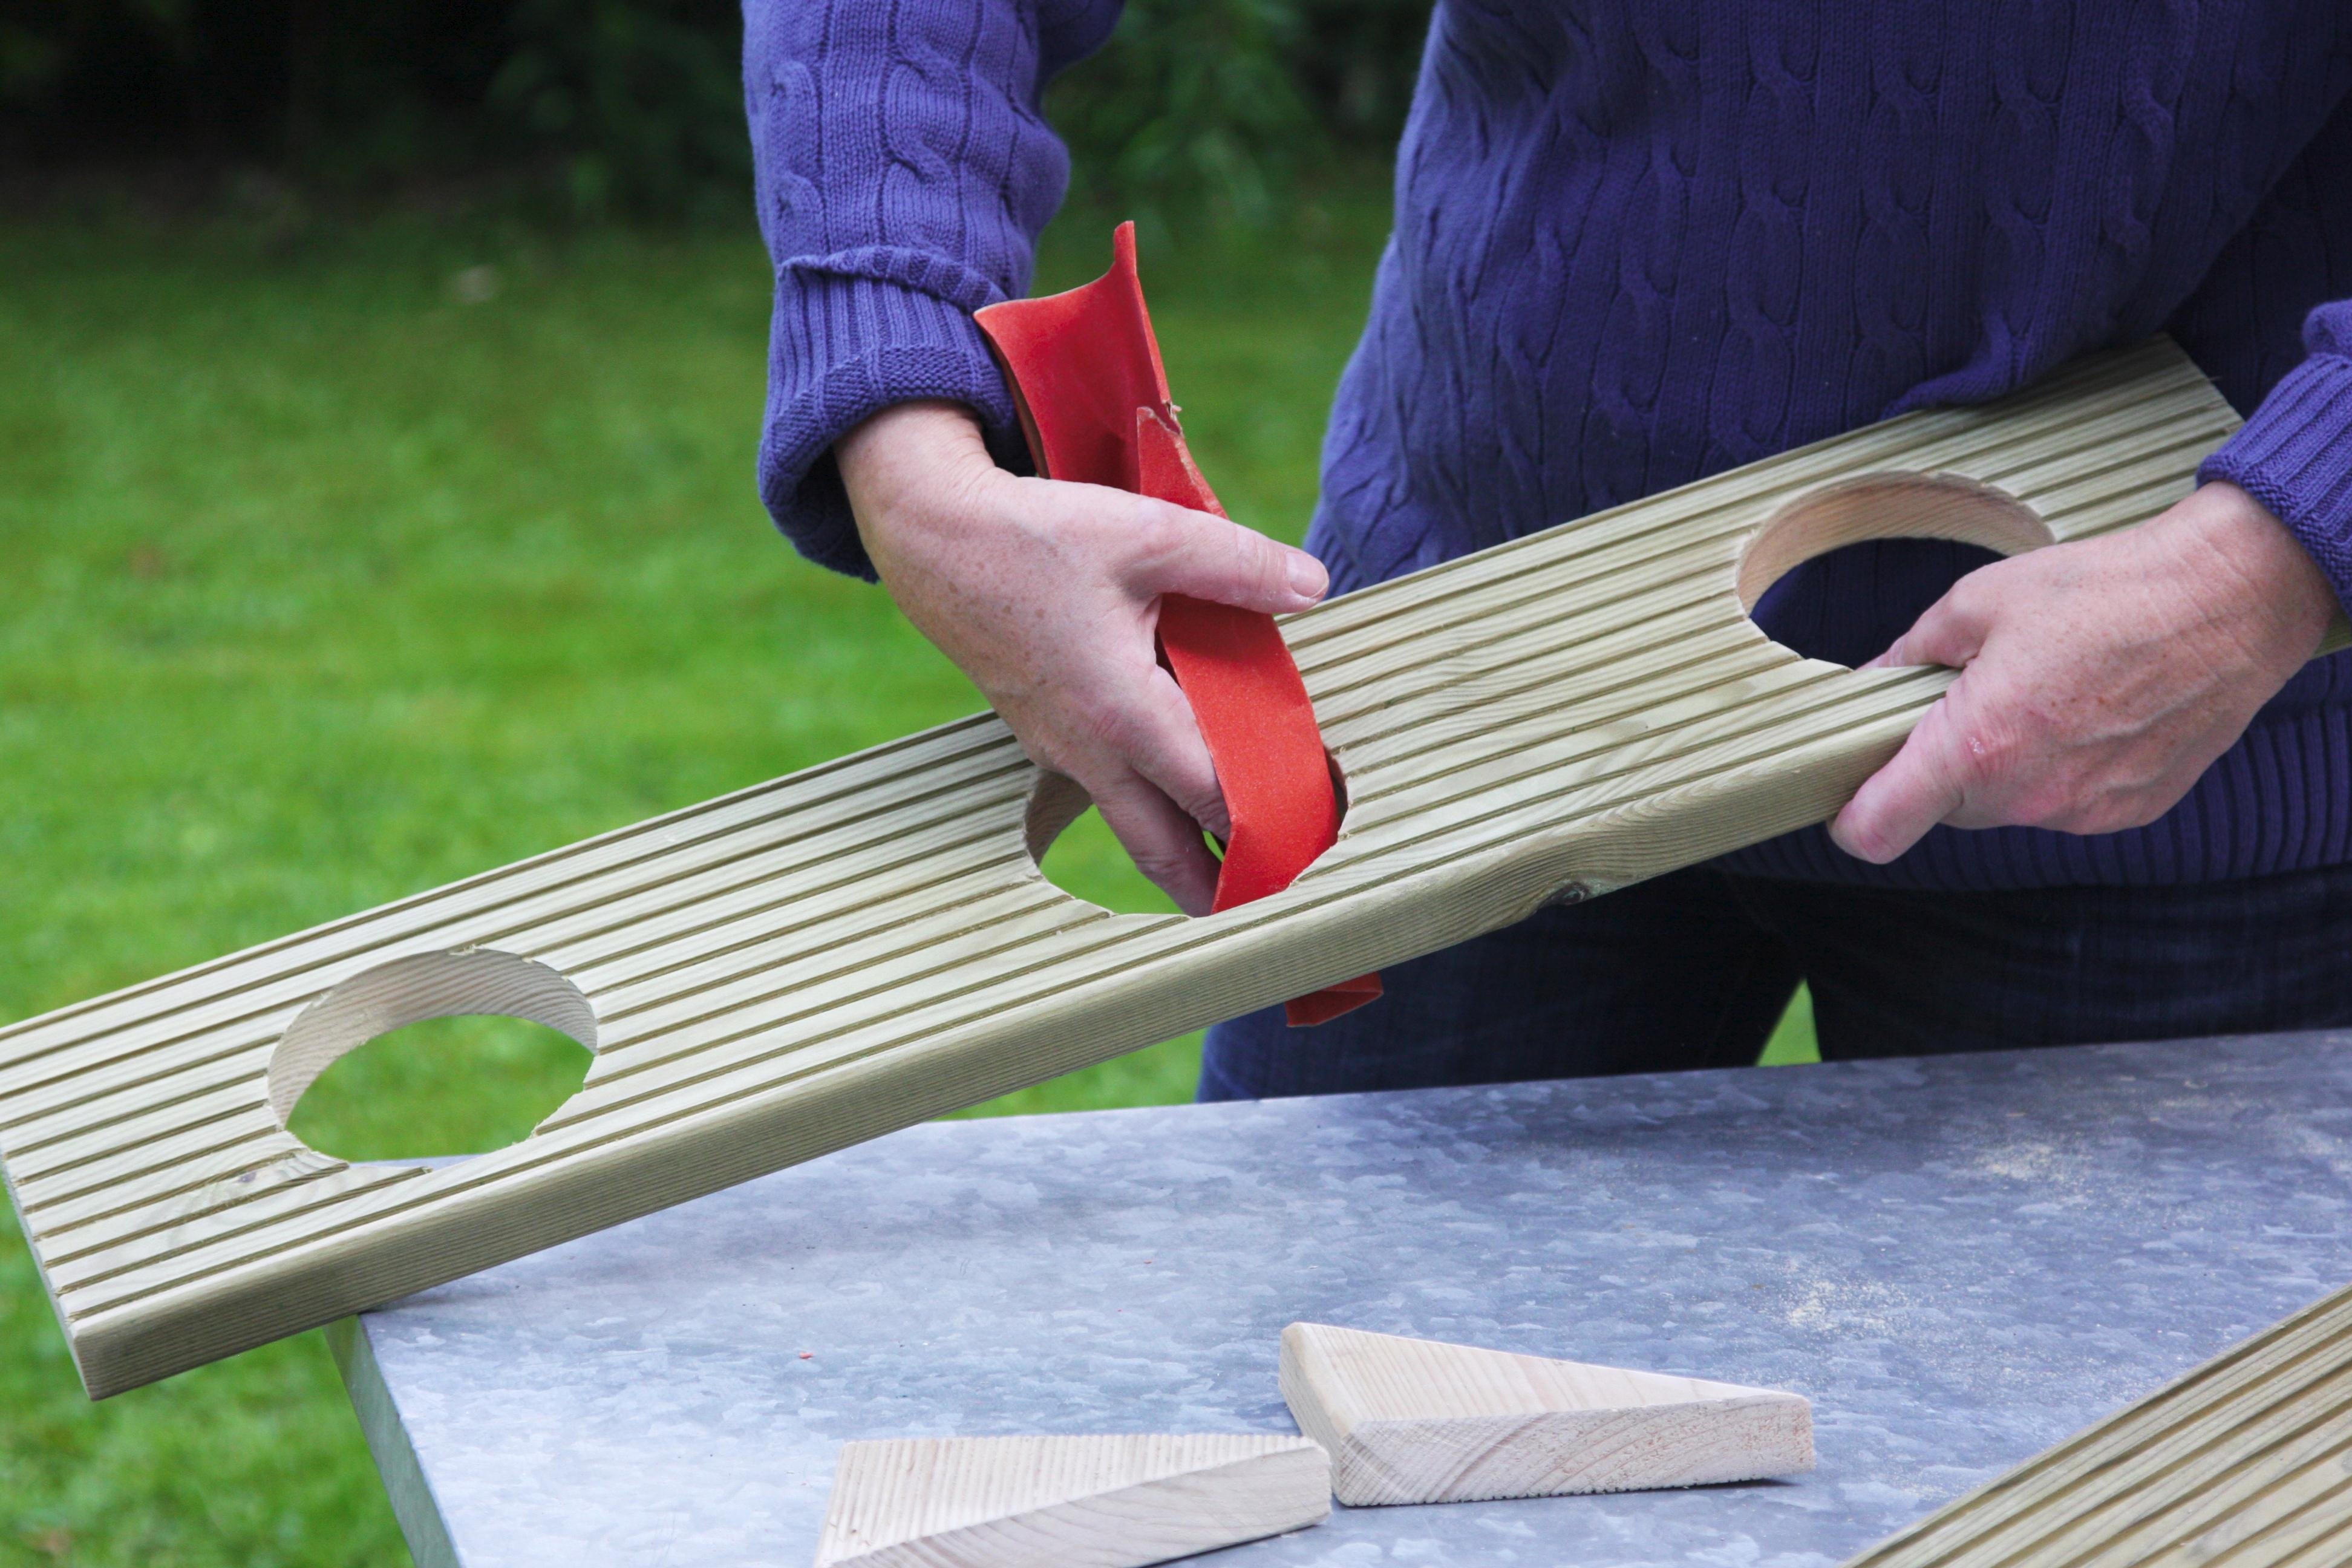
Step 2: Cutting the boards
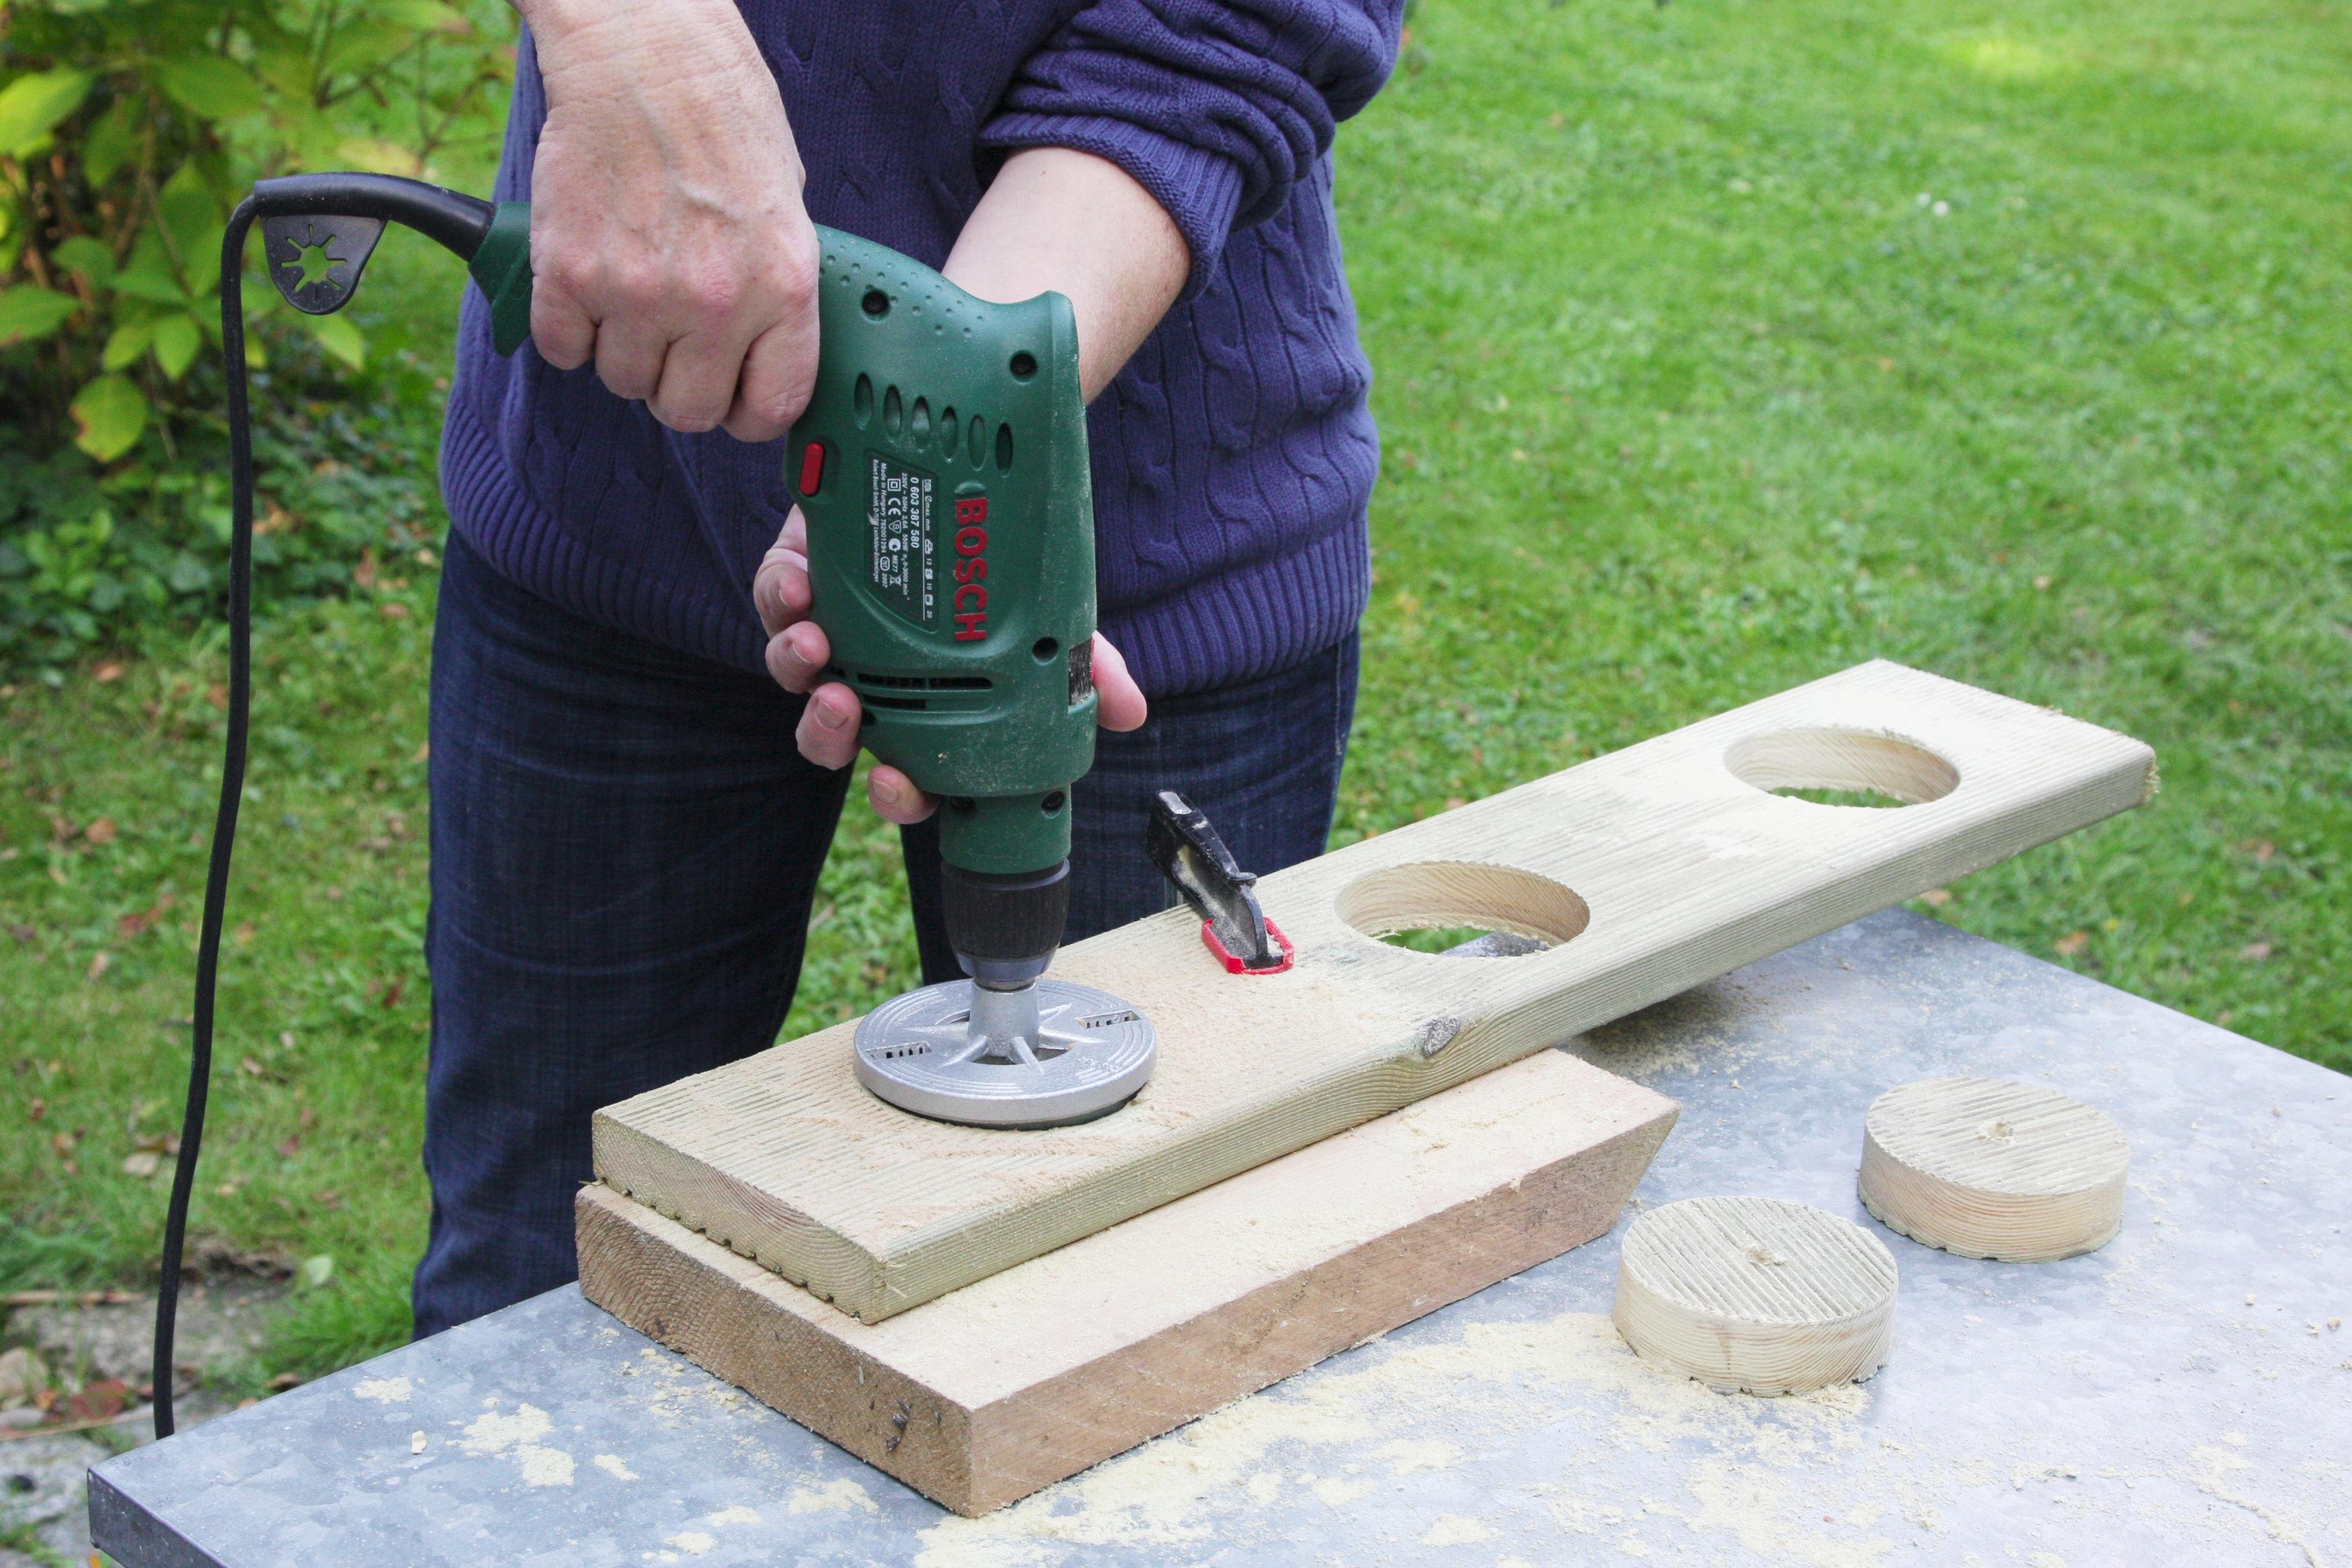
Prepare to cut the boards with the cutter. Measure the pots and draw the outline you need to cut it out. If you find it difficult or you lack the necessary tools, you can do so at the store where you purchased the wooden boards. Join the two boards with the proper nails and fix the wooden triangles.
Step 3: Paint the pot holder and pots
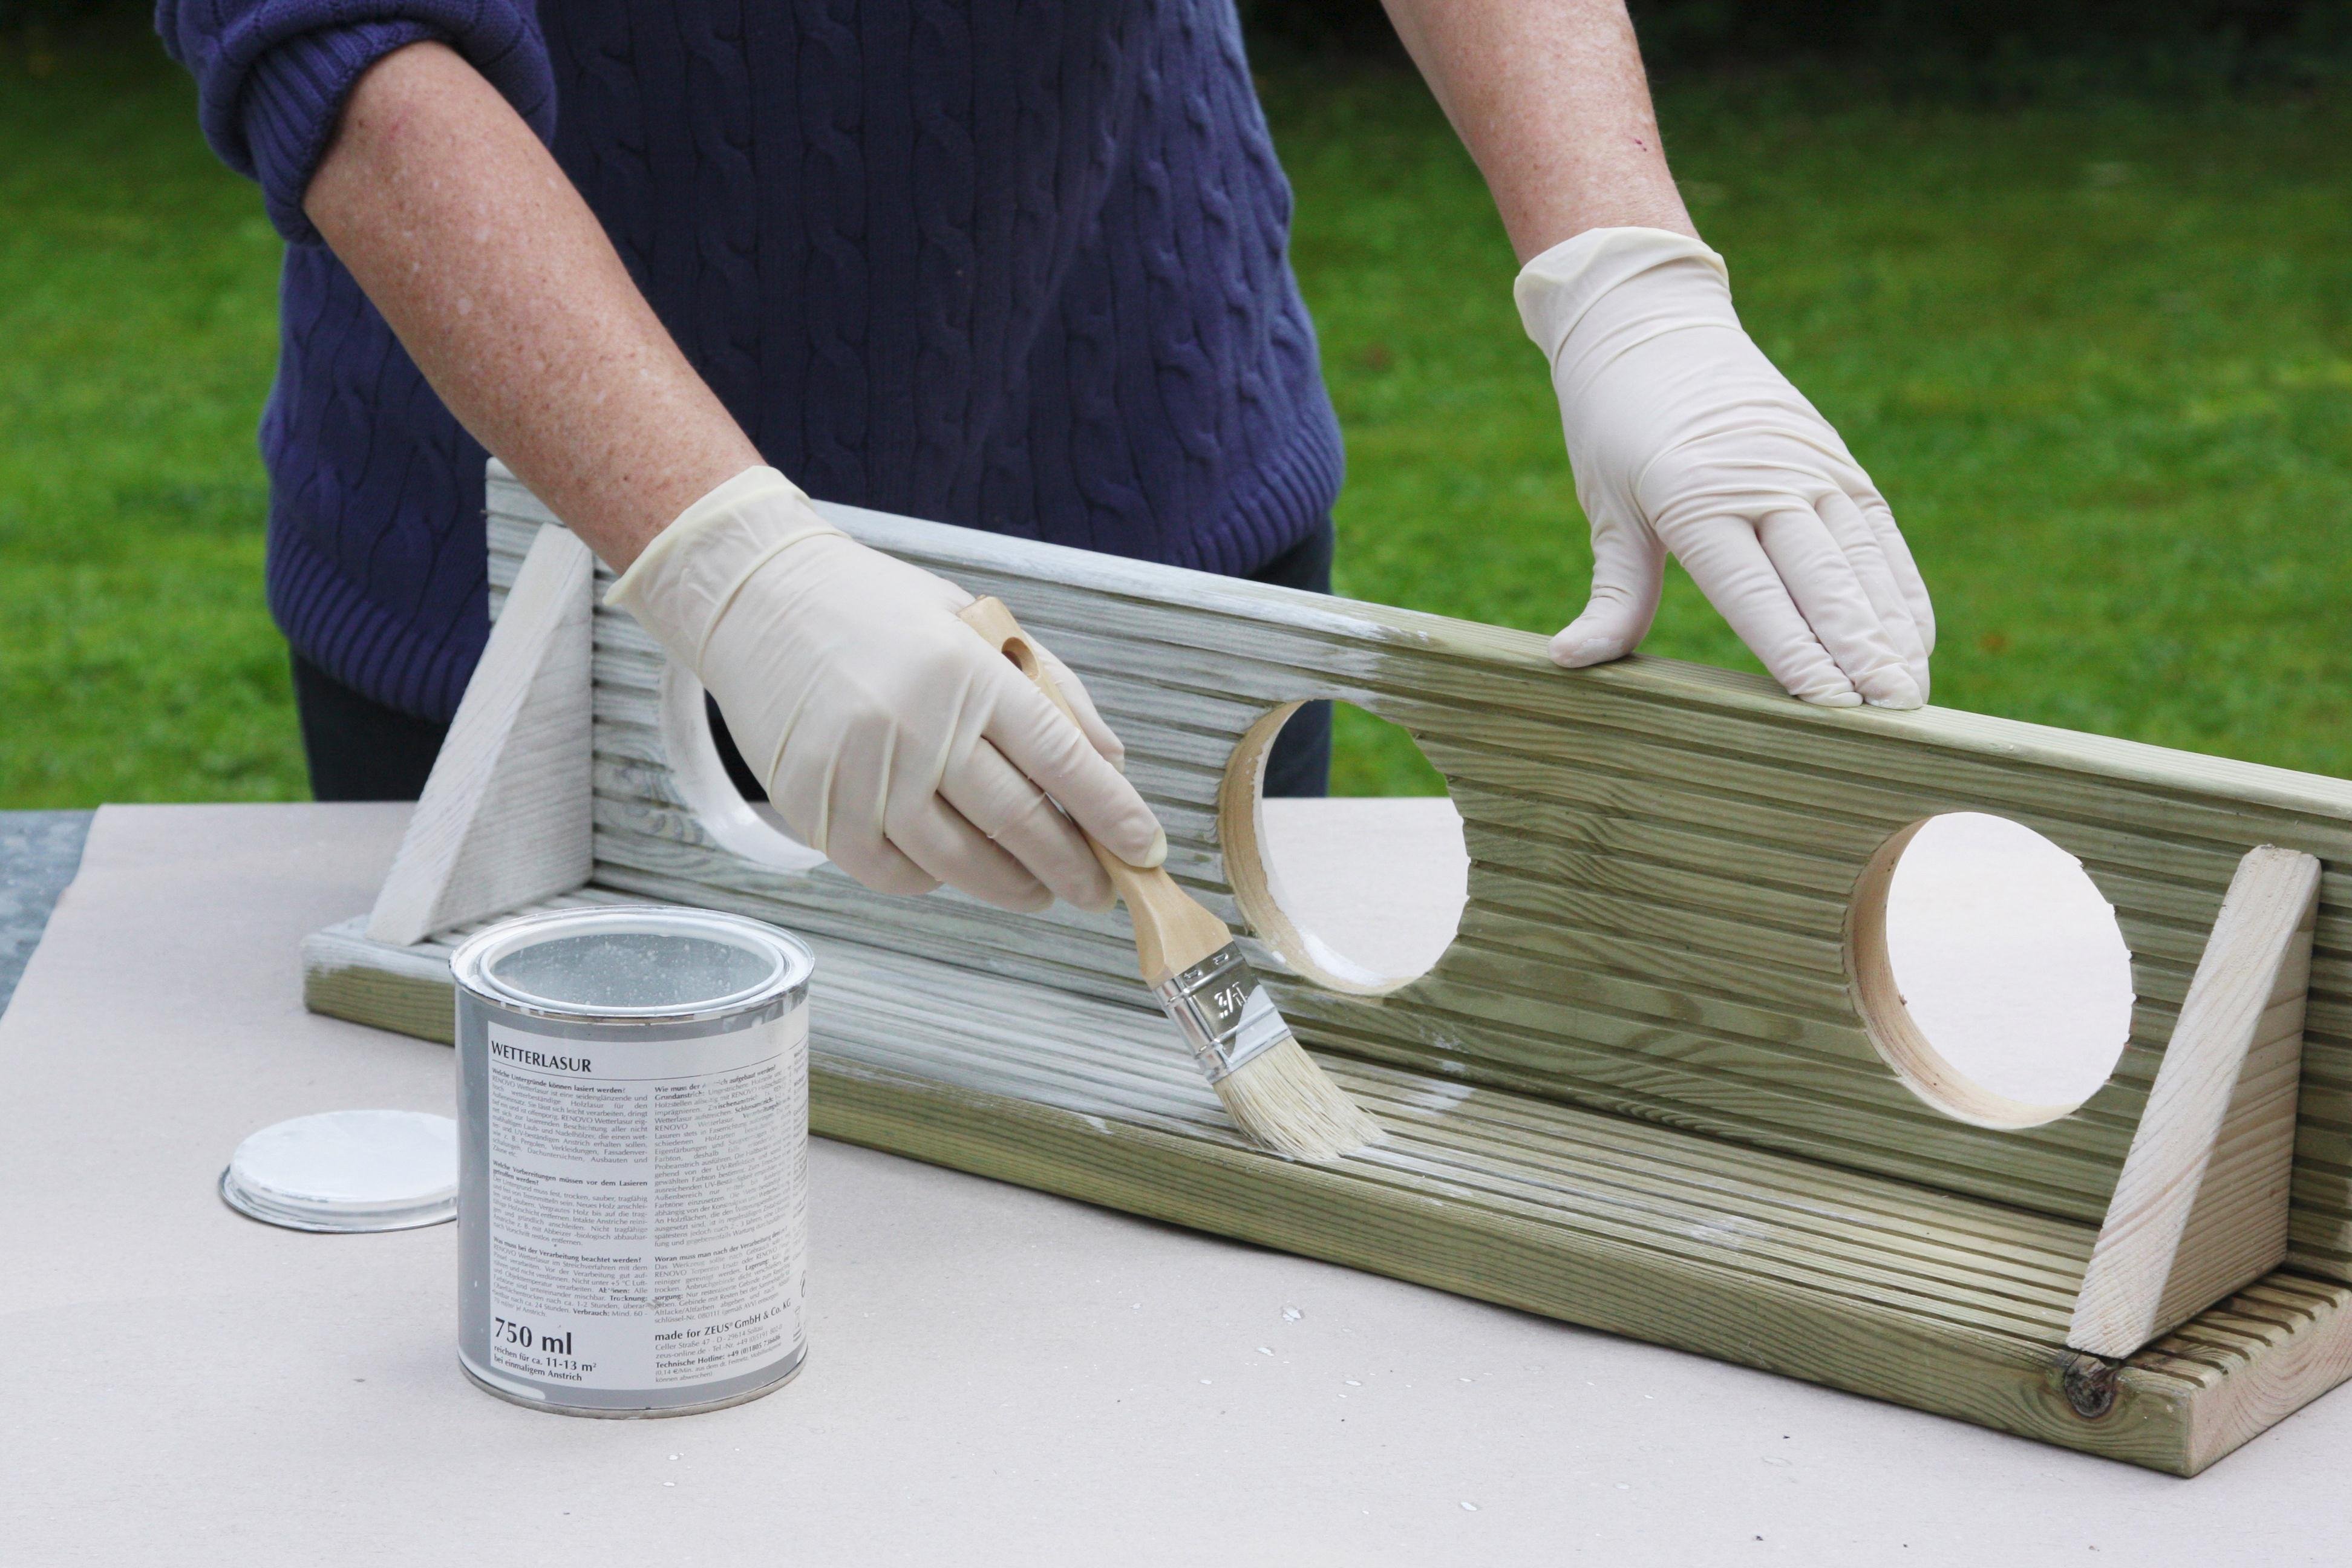
Paint the pot holder in the desired color. If you use white to give a vintage look, use a single layer of paint and then set the color using lacquer.
Also, if you want to use a stronger color, for example green, blue or yellow, you will need to apply two layers of paint. You’ll get the vintage look by polishing the edges until you obtain the natural color of the wood. The metal buckets are painted with special paint for metal. We suggest a vivid color, which will show off the plants.
Step 4: Polishing and finishing
Even if you finished the wood before starting this DIY project, you need to polish it again at the end. Use fine sandpaper so that the wood will be pleasant to the touch. Fix the hangers for mounting on the wall.
Step 5: Place the flower pots
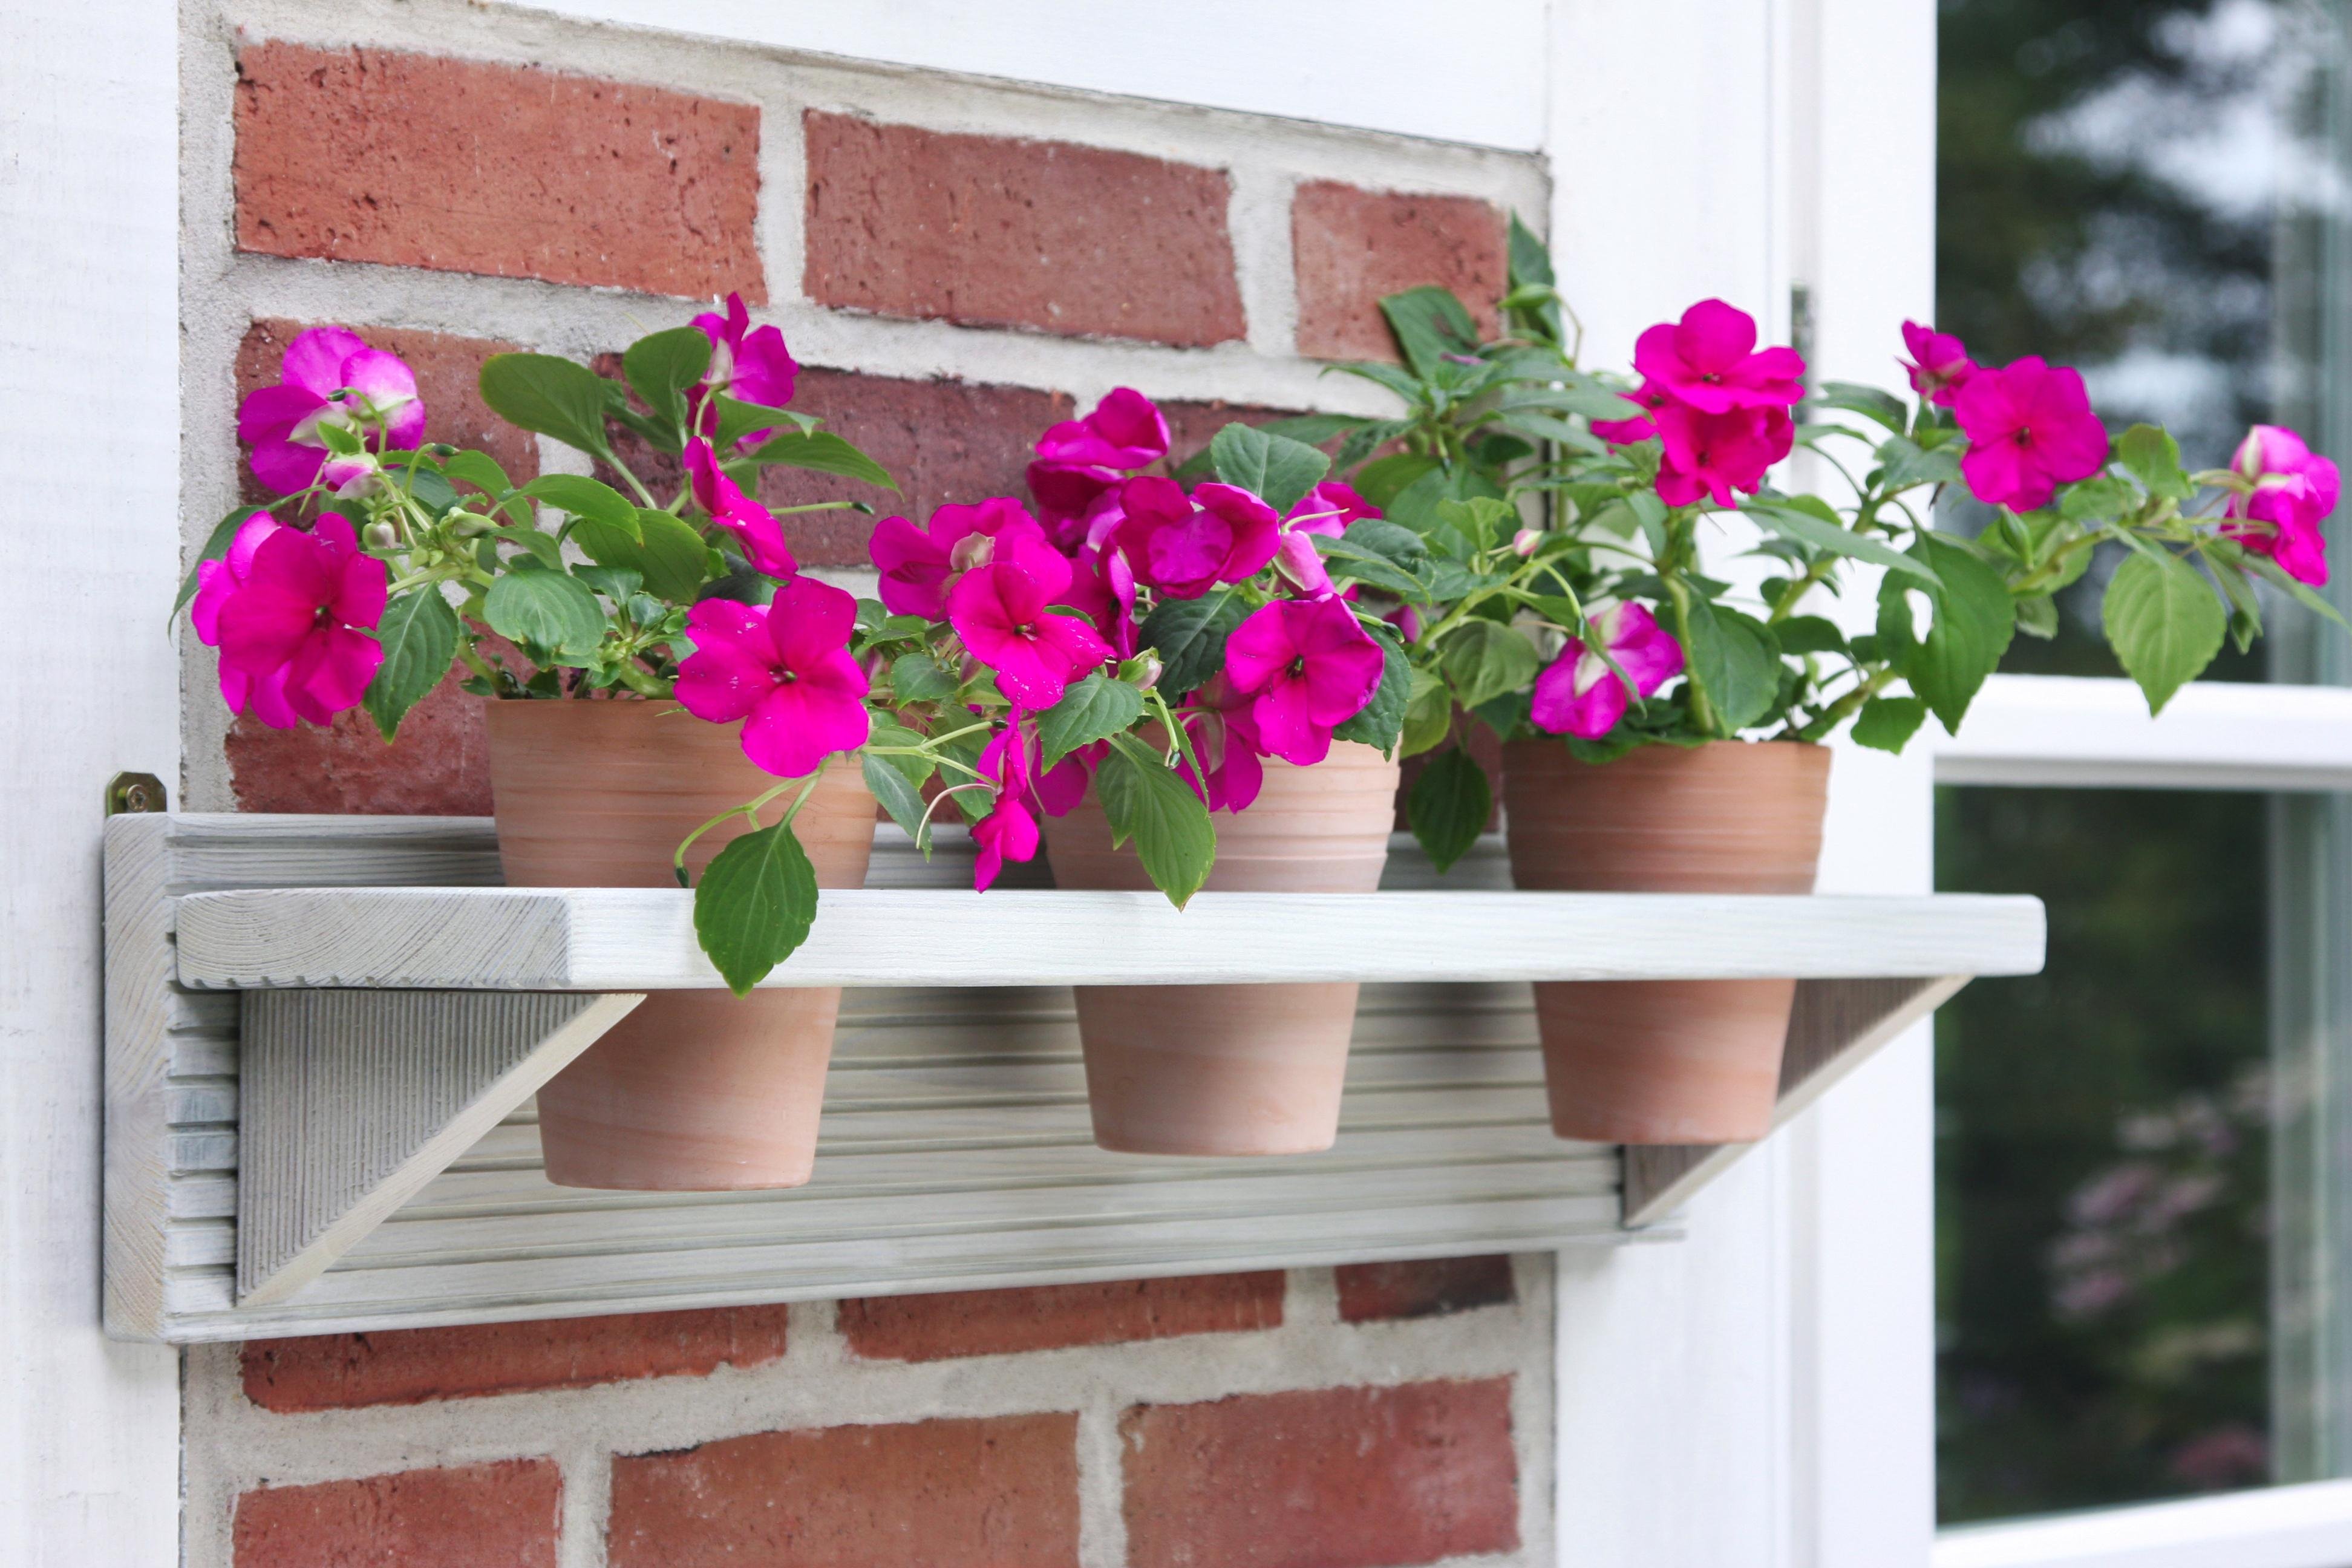
Put the flower pots in holders and lay them on the shelf. The pot holder is ready! You found it difficult?


0 Comments